Friday, October 30, 2009

Crispy Flat Bread and Olives

The usual snacks that accompany watching the World Series or Monday Night Football deserve an occasion special boost. I make a crunchy snack using pizza dough and olives that is always the first item to disappear when some friends are over to watch a game or play poker. I have done variations for some time without thinking of putting the directions on paper but a TV food show stimulated me into action. I was watching a food show with suggestions as to what to serve when the guests were over to watch a game. They were among other items, making my crispy flat bread snack.

Their procedure was close enough for me to think that they might have been at my house one time when I served the snack. There were some major differences but it was close enough to confirm that this is an idea to be shared and enjoyed while watching the Phillies beat the Yankees when they come home to Philly on Saturday

Crispy Flat Bread and Olives

Ingredients:
8 ounce pizza dough ball
8 ounces of pitted olives (Kalamata and Manzanille)
1 clove garlic
2 tablespoons, extra virgin olive oil
1 tablespoon .Balsamic vinegar
2 ounces grated Parmesan cheese

Preparation:
Preheat oven to 400’
Step 1 in food processor mince olives then add, garlic, olive oil and balsamic vinegar
Step 2. process again until all elements are mixed( about 30 seconds) then set aside
Step 3 hand flatten pizza dough ball and then use a rolling to flatten very thin
Step 4.cut dough into strips about 2” wide and about 4 “ long
Step 5 arrange strips on a cookie sheet
Step 6. place a generous amount of the olive mixture down the center of each of the strips
Step 7. bake in oven until strips are brown and crispy ( about 8 or 10 minutes)

Service: Sprinkle Parmesan lightly over olive mixture.This recipe makes about 18 decent size crackers if you have rolled the dough really thin.

Afterthoughts: Get the dough ball at your local pizza shop and adjust ingredients if the dough ball is more than 8 ounces. Keep an eye on the baking so the strips are not overdone.
I have a pizza stone that I use in the oven which works well but the cookie sheet does the job if you don’t have a pizza stone
Kalamata are the purplish Greek olives and the Manzanille are green Spanish olives
If you have a crowd and want some variety, Basil Pesto also works well down the center of the strips

Remember: Roll the dough really thin!
Friday, October 23, 2009

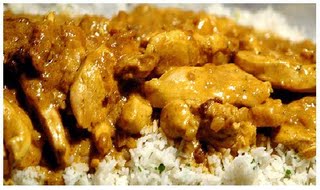
Phillies Victory-Chicken Curry


I hesitate to put quick and easy into a recipe description since it leaves out the description of the most important element of a dish. That of course is how it tastes.

When preparing meals for the family nutrition and food group balance is obviously important. Taste must be the starting point for me with the other elements following. The recipes that are in Buck Cooks are “taste tested”. If it doesn’t taste good to me it will not make the grade here without serious caveats as to why it is appearing.

The chicken curry recipe is here because I think it is a great tasting recipe but it also happens to be quick and easy to prepare.. I can attest to that since we prepared it the other night under severe time constraints. We got home 57 minutes before the Phillies were scheduled to play the Dodgers in game 5 of the National League Championship Series

Chicken Curry was ready for serving by the first pitch by Cole Hamel and the taste was enhanced by the Phillies winning of the National League Pennant again.

Phillies Victory Chicken Curry (6 servings)

Ingredients:
2 Tbsp butter
1 cup minced onion
1 cup chopped celery
4 cloves garlic minced
½ cup flour
1-2 Tbsp curry powder (we use more)
1tsp dry mustard
½ tsp salt
¼ tsp pepper
1 tsp paprika
dash cayenne
1 ¼ cup strong chicken stock
1 cup light cream
3 Tbsp catsup
2 boneless poached chicken breasts diced
1 cup rice

Preparation:

Step 1. Start the rice in the rice cooker according to your cooker directions
Step 2. melt butter in large skillet
Step 3. add onion, celery and garlic- sauté for 2-3 minutes
Step 4. combine dry ingredients & add to the onion mixture
Step 5. Slowly add chicken broth and cream
Step 6. add catsup and cook for 2 minutes
Step 7. add diced chicken
Step 8. reduce heat to simmer, stir occasionally for 5 minutes
Add chicken broth if the mixture is too thick

Service: The rice should be ready and the chicken curry is served over rice.

Some traditional Condiments to accompany the dish are:
Raisins
Chutney
Shredded coconut
Peanuts

Afterthoughts:
This dish is especially good after a night in the fridge.
We sometimes add diced apple to the cooking process but skip it most of the time.
The apple in the dish is not necessary (leave it out)
The basic recipe calls for 2 tablespoons of curry – we use 4- try 2 the first time

Buck Cooks is a daily blog covering the best recipes and kitchen cookware information.

Thursday, October 22, 2009

Creme Brulee

3529_MEDIUMI suppose there is someone who doesn’t like Crème Brulee but I haven’t met that person... A ramekin with the caramelized golden sugar top covering the smooth creamy Crème Brulee is a perfect way to end the meal.

I have had some memorable examples of this dessert. Langan’s Brasserie located just off Picadilly in London was often visited years ago not only for the special atmosphere, but I knew that whatever level of excellence of the meal it would end well with their Crème Brulee. Langan’s has now become a small chain of interesting operations but Peter Langan is gone and Michael Caine who initially financed the operation is nowhere in sight and their great Crème Brulee has disappeared with them.

That Crème Brulee of years ago has been a fond memory until recently. A friend who is a special cook served this dessert a few months ago at a dinner party and it transported my memory back to the Langan’s of years ago. Mary has shared her simple classic approach and I know you will have success and kudos from friends when you end your meal with this reprise of Langan’s Crème Brulee as done by our friend Mary.

Ingredients:

4 egg yolks
Pinch salt
1 vanilla bean
1 ½ cups heavy whipping cream

Preparation:

Step 1. Combine egg yolks sugar and salt and whip together
Step 2. Put cream into a sauce pan
Step 3. Split and scrape vanilla bean into cream
Step 4. Heat cream over medium heat until bubbles appear along side of pan
Step 5. Remove from heat
Step 6. Add heated cream slowly into eggs while stirring continuously
Step 7. Pour mixture into ramekins
Step 8. Place ramekins into a water bath that reaches mid way up the side of the ramekins. ( The water previously having been heated to boiling)
Step 9. Bake @ 325’ for 30 minutes
Step 10. Remove from water bath cover each ramekin with film and refrigerate for several hours or overnight

Prior to serving: Sprinkle a generous amount of white sugar on top of each ramekin
Caramelize sugar using a propane torch (burnz-omatic type)

Important afterthoughts;

I believe the type of torch used by a plumber does a better job than the dainty ones sold at high end kitchen supply shops. Before lighting the torch, make sure that no flammable items are nearby. Just remember to move the flame to the Crème Brulee slowly until you get an idea of distance and time needed to make the golden caramelized crust that will create a collective Ahhhh from your guests when you serve them Crème Brulee

Important tip from Mary:

She always finely strains her mixture before pouring into the ramekins. This removes any tiny egg elements that may have approached being cooked when adding the heated cream.
Buck Cooks is a daily blog covering the best recipes and kitchen cookware information.

Tuesday, October 13, 2009

Puffy French Toast

French toast was the subject of a recent post in Simply Recipes by Elise Bauer. Elise writes a blog that is a source of valuable information for anyone interested in food preparation.

I checked her offering with a bit of trepidation since I was thinking about posting my French Toast recipe on Buck Cooks. The recipe offered by Elise is worth reviewing, as is almost everything she writes in her Blog. Fortunately for me she did not use my approach to French toast..

My Puffy French toast was a favorite in a small waterfront restaurant we operated years ago in conjunction with one of our projects. On weekends I would go into the restaurant kitchen and annoy the operators by working breakfast for a few hours each Saturday and Sunday morning during the summer months. I enjoyed those few hours since I only did a few things – the Omelets and the Puffy French Toast-

Beach Marina’s Puffy French Toast

Ingredients:
½ cup milk
1 egg
¾ cup of your favorite pancake mix
4 slices of dense white bread slices(crusts removed)
½ cup shortening
Maple syrup

Preparation:
Step 1. In bowl- beat milk, egg and pancake mix until combined
Step 2. Cut each bread slice diagonally in half
Step 3. Dip each bread slice in batter and leave in batter for a minute
Step 4. heat shortening in a heavy skillet
Step 5. cook bread slices in shortening about 3 minutes on each side until golden and puffy

Serve warm with heated maple syrup and a sprinkle of powdered sugar

Simply Recipes suggests a Silver Palate Cookbook addition of some grated orange zest to their recipe. That sound like a good idea and I think I’ll try it next time with the Puffy French Toast. You now have two excellent approaches to French Toast. Give them each a try and send along any comments you might have to contribute

Afterthoughts: I use a Pepperidge Farm white bread that is left out for a day before preparation. Make sure you use a dense bread, either white or wheat. The airy loaves won’t do the job. In the restaurant I used professional equipment but I have done this at home in a heavy skillet successfully many times. The sugar is simply for effect since the maple syrup is sweet enough. A thin twisted slice of orange on some greens along side the toast also adds to the visual effect of the offering

Buck Cooks is a daily blog covering the best recipes and kitchen cookware information.

Friday, October 9, 2009

Irish Skillet Bread

422696593_b13531b7e8The local news on TV last night covered the opening of The Loveland Ski area which was the earliest opening in more than 20 years. The sight of skiers on good snow accelerated my thoughts of recipes and entertaining themes that warm things when the snow is falling. One of the amazing things about living in the mountains of Colorado is that that there is seldom a day when we are snowed in, but a snowy day is one that starts well with a warm slice of Irish Skillet Bread and the morning coffee..

The Irish have a way with breads and our skillet bread recipe has more of a cake like texture than typical soda bread. Each has a place in our recipe file, but today with a light snow falling at our elevation, it is a Skillet Bread day.

Irish Skillet Bread

Ingredients:
3 cups all purpose flour
¾ cup sugar
3 tsp baking powder
¾ cup raisins
¼ cup butter (melted)
1 egg
1¾ cups milk

Preparation:

Step 1. Mix all dry ingredients with the raisins
Step 2. Beat egg with milk and add to dry mixture beating lightly until mixed
Step 3. Stir in melted butter
Step 4. Place in iron skillet and bake in oven for 1 hour at 300 degrees

Served with an assortment of jams and coffee it will be a perfect start on a chilly morning.

Checking the condition of boots and snowshoes is a worthwhile activity on a day like today. There will be serious snow soon and it is important to be ready to make it to the dinner parties that accompany the season. Snow is no excuse for not entertaining. In the mountains if you are having party and it snows on the day –keep cooking - everyone will show up. Flatlanders on the guest list might have trepidations but the high country folks don’t think twice.

Afterthought: When the Phillies show up in Denver to play the Rockies on Saturday I think I’ll send some warm Irish Skillet Bread to their locker room. There may be weather conditions in which the “Boys of Summer” did not expect to be playing baseball.

Tuesday, October 6, 2009

Butternut Squash Soup


This is the season to organize the soup recipes. Cooler weather means soup time is back in our house. There is something that is more than warming provided by a bowl of a special soup on a crisp Autumn day. Soup is a special comfort food and our Spicy Butternut Squash Soup fills the need to meet the cooler weather with a seasonal answer. This seasonal special soup was our cooking activity last Saturday and the result was as good as the memory.

Spicy Butternut Squash Soup

Ingredients:
2 ½ Lb. butternut squash
2 tablespoons butter
2 onions thinly sliced
2 stalks celery, diced
1 clove garlic, crushed
1 tsp. ground cumin
1 tsp. ground coriander
1 tsp. chili powder
3 ¾ cups chicken broth
2/3 cup light cream or half & half
salt & pepper to taste
Chopped cilantro for garnish

Preparation:
Step 1. Peel squash with vegetable peeler
Step 2. Cut into thick slices and then cube
Step 3. Remove seeds which you will find in the thicker part of the squash
Step 4. Melt butter in pot and add then sauté onions, celery and garlic for 5 minutes
Step 5. Add squash and spices and cook for 5 minutes longer
Step 6. Add chicken broth, cover pot, cook over medium heat till squash is tender(15-20 minutes)
Step 7. Cool slightly then puree in batches in blender or food processor
Step 8. Return to pot, stir in cream & heat to serving temperature
When serving garnish with chopped cilantro. The cilantro adds more than color!

Afterthoughts: When we were making this we didn’t bring out the food processor we simply used a blender. When blending I tried to remember when we bought the blender I was using. It was too long ago to remember but it has served us well for many , many years. If you are thinking about getting a new blender the Waring surely needs consideration. Few people remember Fred Waring’s early TV appearances with his Choral group the Pennsylvanians but the blenders invented by Frederich Jacob Osius, financed by Waring and named the Waring Blendor(with an O) are still blending well.

Buck Cooks is a daily blog covering the best recipes and kitchen cookware information.